Showing posts with label ESXi - Hypervisor. Show all posts

Monday, March 2, 2020

How to Inject ESX 5.2.1 Host Drivers into VMware ESXi 5.0U1 Media


The procedure for PXE Booting or SAN Booting an ESXi 5.0U1 host is the same as for an ESXi 4.0 host, with the exception of creating the injecting the host drivers into the ESXi 5.0U1 bundle. The following text documents how to inject the host drivers. Use the following text instead of the text for the remaster-iso script in the XgOS Remote Booting Guide.
After completing the following procedure, you can use the SAN Boot procedure for ESXi 4.0 hosts document to configure the ESXi 5.0U1 host for SAN Booting.
 
Considerations:
Be aware of the following:
• Creating the custom ISO is accomplished through Microsoft Windows PowerShell—and specifically the VMware vSphere PowerCLI plug-in for PowerShell. The Windows server will need this tool installed
• Creating the custom ISO is supported on a Windows host server only. The server requirements are determined by the PowerShell application
• You use a pre-configured ESXi bundle as a baseline, then inject the Xsigo/Oracle bits into it. The OS file is available on the VMware website: update-from-esxi5.0-5.0_update01.zip
• You will need full administrative rights on the Windows server where you will be creating the custom ISO

Manually Injecting the Host Drivers into the ESXi 5.0U1 Bundle.

The following procedure assumes the working directory is: \images\New for the user “adminA”.
 
To inject the host drivers into the ESXi 5.0U1 bundle, follow this procedure:

Step 1 Install PowerShell on the Windows server if you have not done so already.

Step 2 Install the PowerCLI plug-in if you have not done so already.

Step 3 Download the update-from-esxi5.0-5.0_update01.zip file to the Windows server.

Step 4 Start PowerCLI.

Step 5 In PowerCLI, run the following commands to import the ESXi 5.0 bundle and the host drivers into PowerCLI:
 
Add-EsxSoftwareDepot -DepotUrl C:\<file directory>\update-from-esxi5.0-5.0_update01.zip
Add-EsxSoftwareDepot -DepotUrl C:\<file directory>\xsigo_5.2.1.ESX.1-1vmw.500.0.0.472560.zip


Step 6 Run the following command to specify the profile that you want to use when creating the output ISO:

New-EsxImageProfile -CloneProfile ESXi-5.0.0-20120302001-standard -Name ESXi-5.0.0-20120302001-standard-xsigo
Step 7 Run the following commands to add the IB stack and other dependencies to the depot:

Add-EsxSoftwarePackage -ImageProfile <profile name> -SoftwarePackage net-ib-core
Add-EsxSoftwarePackage -ImageProfile <profile name> -SoftwarePackage net-mlx4-core
Add-EsxSoftwarePackage -ImageProfile <profile name> -SoftwarePackage net-ib-mad
Add-EsxSoftwarePackage -ImageProfile <profile name> -SoftwarePackage net-ib-sa
Add-EsxSoftwarePackage -ImageProfile <profile name> -SoftwarePackage net-mlx4-ib
Add-EsxSoftwarePackage -ImageProfile <profile name> -SoftwarePackage net-xscore
Add-EsxSoftwarePackage -ImageProfile <profile name> -SoftwarePackage net-xsvnic
Add-EsxSoftwarePackage -ImageProfile <profile name> -SoftwarePackage net-xve
Add-EsxSoftwarePackage -ImageProfile <profile name> -SoftwarePackage scsi-xsvhba

Step 8 Run the following commands to create single output ISO containing all required files from the depot. The following example assumes unsigned drivers to provide the most complete example:
 
Export-EsxImageProfile -ImageProfile ESXi-5.0.0-20120302001-standard-xsigo -ExportToIso -FilePath C:\<file directory>\ESXi-5.0U1-623860.xsigo-5.2.1.iso

NoSignatureCheck
Supported Host Drivers

This section documents information about the supported ESX host drivers and how to obtain them.
 
Downloading Supported Drivers

You need access to the support site to download the drivers. To get the drivers:
Step 1 Log in to the download portal (http://www.oracle.com/technetwork/server-storage/xsigo-1870185.html).
Step 2 Navigate to the binaries and download them.
VMware ESXi 5.0 Host Drivers

For this release, host drivers for VMware ESXi Server 5.0U1 are: update-from-esxi5.0-5.0_update01.zip
 
Both the InfiniBand and host drivers are contained in this bundle, which is a new packaging method for distributing Xsigo/Oracle host drivers. Due to this new packaging method, the method for installing the host drivers has changed. See: Installing 5.0.0-ESX Host Drivers Directly from the ESXi 5.0 Bundle


How to Collect Diagnostic Data From VMware ESX/ESXi and VirtualCenter Server


There are a couple of methods for collecting diagnostic data from VMware ESX/ESXi Servers / VirtualCenter Server.


A) One method is to login as root to the ESX/ESXi Server Service Console command line as user 'root'. In the /root directory run the command vm-support. This will generate a tarball named something similar to:

esx-2008-month-day--hour.min.<PID>.tgz.

There are other flags and switches you may use with the vm-support command to generate:

1) Performance snapshots
2) Gather Virtual Machine specific debugging
3) Suspend Virtual Machine to generate VM core files and include VM memory state with vm-support output.

For complete information on the command line options you can run with vm-support see the manpage for vm-support on your ESX/ESXi Server.

B) Second method is from within the VI Client connecting directly to the host go to File - Export - Export Diagnostic Data.

C) Third method using the VI Client to connect directly to the VirtualCenter Server managing multiple ESX Server hosts - go to the Administration pull down menu - Export Diagnostic Data - Select ESX hosts and make sure box is checked to "Include information from VirtualCenter Server and VI Client".

Choose where on the Windows Server hosting your VirtualCenter Server to store the diagnostic data. This method not only collects VirtualCenter Server specific information but also generates and collects the vm-support output for the ESX Server hosts you select.

You want to use the VirtualCenter method to generate and collect diagnostic data if:

1) Problem is VMotion, Migration related
2) Problem is related to creating or deploying templates or clones
3) Problem affects more than one ESX host
4) Problem is VirtualCenter Server related, for example VC Server performance reporting
5) Problem is related to VirtualCenter Server Plugins / Addons such as HA, DRS, VCB, Update Manager, Capacity Planner, VMware Converter etc...
6) Problems using the Snapshot Manager

Monday, June 24, 2019

VMware Interview questions

VMware Interview questions

1.What is a Hypervisor?
It is a program that allows multiple operating systems to share a single hardware host. Each operating system appears to have the host’s processor, memory, and other resources all to itself. However, the hypervisor is actually controlling the host processor and resources, allocating what is needed to each operating system in turn and making sure that the guest operating systems (called virtual machines) cannot disrupt each other.
2.What is a .vmdk file?
This isn’t the file containing the raw data. Instead it is the disk descriptor file which describes the size and geometry of the virtual disk file. This file is in text format and contains the name of the –flat.vmdk file for which it is associated with and also the hard drive adapter type, drive sectors, heads and cylinders, etc. One of these files will exist for each virtual hard drive that is assigned to your virtual machine. You can tell which –flat.vmdk file it is associated with by opening the file and looking at the Extent Description field.
3.What is VMware vMotion?
VMware VMotion enables the live migration of running virtual machines from one physical server to another with zero downtime.
4. What is promiscuous mode in Vmware?
  • Promiscuous mode is a security policy which can be defined at the virtual switch or portgroup level
  • A virtual machine, Service Console or VMkernel network interface in a portgroup which allows use of promiscuous mode can see all network traffic traversing the virtual switch.
  • If this mode is set to reject, the packets are sent to intended port so that the intended virtual machine will only be able to see the communication.
  • Example: In case you are using a virtual xp inside any Windows VM. If promiscuous mode is set to reject then the virtual xp won’t be able to connect the network unless promiscuous mode is enabled for the Windows VM.
·         5. What is a snapshot?
·         A snapshot is a “point in time image” of a virtual guest operating system (VM). That snapshot contains an image of the VMs disk, RAM, and devices at the time the snapshot was taken. With the snapshot, you can return the VM to that point in time, whenever you choose. You can take snapshots of your VMs, no matter what guest OS you have and the snapshot functionality can be used for features like performing image level backups of the VMs without ever shutting them down.
 6. What is VDI?
  • VDI stands for Virtual Desktop Infrastructure where end user physical machine like desktop or laptop are virtualized due to which VMware described VDI as “delivering desktops from the data center”.
  • Once VDI is used the end user connect to their desktop using a device called thin client.
  • The end user can also connect to their desktop using VMware Horizon View installed on any desktop or mobile devices
 7.what is VMware HA?
  • VMware HA i.e. High Availability which works on the host level and is configured on the Cluster.
  • A Cluster configured with HA will migrate and restart all the vms running under any of the host in case of any host-level failure automatically to another host under the same cluster.
  • VMware HA continuously monitors all ESX Server hosts in a cluster and detects failures.
  • VMware HA agent placed on each host maintains a heartbeat with the other hosts in the cluster using the service console network. Each server sends heartbeats to the others servers in the cluster at five-second intervals. If any servers lose heartbeat over three consecutive heartbeat intervals, VMware HA initiates the failover action of restarting all affected virtual machines on other hosts.
  • You can set virtual machine restart priority in case of any host failure depending upon the critical nature of the vm.
NOTE: Using HA in case of any host failure with RESTART the vms on different host so the vms state will be interrupted and it is not a live migration
8. What is storage vMotion?
  • Storage vMotion is similar to vMotion in the sense that “something” related to the VM is moved and there is no downtime to the VM guest and end users. However, with SVMotion the VM Guest stays on the server that it resides on but the virtual disk for that VM is what moves.
  • With Storage vMotion, you can migrate a virtual machine and its disk files from one datastore to another while the virtual machine is running.
  • You can choose to place the virtual machine and all its disks in a single location, or select separate locations for the virtual machine configuration file and each virtual disk.
  • During a migration with Storage vMotion, you can transform virtual disks from Thick-Provisioned Lazy Zeroed or Thick-Provisioned Eager Zeroed to Thin-Provisioned or the reverse.
  • Perform live migration of virtual machine disk files across any Fibre Channel, iSCSI, FCoE and NFS storage


How to boot a Windows VM into Safe Mode in ESX

How to boot a Windows VM into Safe Mode in ESX

Information:
1)      Right Click the VM
2)      Select Edit Settings
a.       Click Options
b.      Select Boot Options
c.       Set the Power-on Boot Delay to 5000ms (5 seconds)
d.      Now the VM will display the BIOS VMWare bios screen for 5 seconds, giving you enough time to click the VM and press F8
3)      Open the console window for the VM. Start the boot process.
4)      Click the console with the mouse to gain focus.
5)      Wait until the VMWare boot screen appears. 

6)      Before the counter reaches 0:00 press the F8 key and don't let up until the Windows Advanced Options Menu appears which will allow selecting the Safe Mode or other options.

Saturday, November 19, 2016

Converting A VMware Image To A Physical Machine

Converting A VMware Image To A Physical Machine


This tutorial shows how to convert an existing CentOS VM to a Physical machine. This tutorial covers the cloning of the VM to an unpartitioned HDD and troubleshoot some of the possible errors that you may have booting the OS on your new hardware. To illustrate this procedure I will use VMware Workstation 7 as the handler to transfer the VM installation to a physical HDD.

1 Requirements
To perform this procedure you will need:
• VMware Workstation, VMware Server or VMware Player.
• CloneZilla ISO image.
• Unpartitioned HDD with enough space to hold your VM image.

2 Preliminary Notes
This tutorial assumes basic knowledge of the cloning process and requires no previous experience on the use of Clonezilla. Make sure your OS is not using in any way the target HDD that will hold your final copy of the VM, otherwise VMware will complain about your disk been in use and CloneZilla will not perform a successful copy of the VM.

3 VMware Configuration
First thing is to make sure your virtual CD/DVD is using your CloneZilla ISO image to boot. Next add your physical HDD as part of your existing VM by clicking the Add button.


Select Hard Drive and click Next.


Select Use physical disk (for advanced users) then click Next.


Make sure you select the correct drive that you want to use for your physical disk and select the option Use entire disk.


Finally give a name to your configuration file then click Finish.


Make sure your final VMware hardware list include this two elements otherwise, start all over.


4 CloneZilla Cloning Process

Start your VMware and boot from your virtual ISO into CloneZilla image. Use the Live option with default settings.


Select your preferred language and continue.


Accept the default option Don't touch keymap and continue.


Select Start_clonezilla and continue.


Select device-device option and continue.


Select Beginner mode and continue.


Select disk to local disk and continue.


Select your source disk and click OK.


Select your target disk and click OK, then press Enter to continue.


You will be presented with a warning, about your existing data on your target disk will be lost, make sure there's nothing usable on your disk before you continue.


You will be presented with a series of questions answer yes to all this prompts.


The cloning process may take a long time.

After the cloning process is finished hit Enter and power off the VM by pressing 0 on the CloneZilla menu.


The cloning process is complete, is now time to install your new HDD to your physical machine.

5 Troubleshooting Physical Machine

More likely your first encounter with your cloned OS will be a filesystem corruption, with the following error: Unexpected Inconsistency. To fix this problem enter your root password and run fsck -y to start the filesystem repair process. The -y answers yes to the questions the fsck command will probably output.


Your next challenge will be fixing your NIC, I have used two different methods to fix this problem.
Go into /etc/udev/rules.d and delete the file 70-persistent-net.rules then reboot. Deleting the file forces the detection process to run again at boot with no baggage left over from the cloning process.

The other way to fix this problem is by edit: /etc/sysconfig/network-scripts/ifcfg-eth0 and add the MAC address of your new NIC.
Open eth0 using vi, type:

vi /etc/sysconfig/network-scripts/ifcfg-eth0

Edit the following line:
HWADDR=
This is my sample config file:
# Micro-Star INT'L CO Gigabit Ethernet Controller
DEVICE=eth0
BOOTPROTO=static
DHCPCLASS=
HWADDR=00:19:B1:2A:BA:B8
IPADDR=10.10.11.50
NETMASK=255.255.255.192
ONBOOT=yes

Save and close the file then reboot the server:

reboot

The system is now ready to be used.

Enabling the VMware vSphere Hot-plug CPU & Hot-Add RAM Feature

Enabling the VMware vSphere Hot-plug CPU & Hot-Add RAM Feature


VMware vSphere’s hot-add Memory and hot-plug CPU functions allow you to add the CPU and Memory while virtual machine is up and running. It will help you to add the additional resources whenever required and no need to bring down the VM for each time. But you can’t remove the resources once you have added the VM while it’s running.

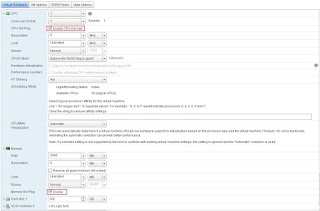
To enable the hot-plug CPU and Hot-add RAM on existing VM.

1. Login to the VMware vSphere Client and Halt the VM.

2. Right click the VM and edit the virtual machine settings.

3. Expand the CPU tab.

4. Navigate to CPU hot Plug option.

5. Select the “Enable CPU Hot Add” Box.

6. Same way you can configure for memory as well. Just enable the Memory Hot plug.


Reference: http://kb.vmware.com/selfservice/microsites/search.do?language=en_US&cmd=displayKC&externalId=2020993

VMware KB: Starting the VMware VirtualCenter Server service fails with the error: Failed to create Secure WebService socket: class Vmacore::SystemException

VMware KB: Starting the VMware VirtualCenter Server service fails with the error: Failed to create Secure WebService socket: class Vmacore::SystemException

Question 8 Explanation

Compartments are the primary building blocks you use to organize your cloud resources. You use compartments to organize and isolate your res...